Bad lighting conditions and camera shakes are common problems that can be easily fixed in post-production. But with so many video editors available on the Internet, you might struggle to find the one that will satisfy all your needs yet suit your gear. What makes the search process even harder is the level of skill required to use a program. But you have nothing to worry about – we’ll show you 3 best programs that will help you make the quality of a video better. For more tools to arm yourself with, check out this guide on the best video enhancement software – then you’ll have 10 options to choose from.
Best 3 Video Quality Enhancer Software
In this post, you’ll find 3 go-to video editors for both amateurs and pros that are compatible with Windows– and iOS-powered computers. So you don’t have to check the technical requirements anymore – all you need to do is to pick video enhancing software depending on the features the apps offer. Now let’s see which option works best for you.
1. Clipify for Windows
Clipify is a powerful video editor with broad functionality and an intuitive interface designed to be accessible to users with little or no video editing experience. In this software, you will find the most frequently used tools for making movie-like videos. For example, Clipify lets you easily change the background using Chroma Key, cut and merge videos, and zoom in on a clip by selecting the scene you want to emphasize. There’s a huge collection of 200+ royalty free tracks to play in your video, 450+ effects to apply, and 50+ text styles to use. With Clipify, you can also slow down and speed up segments of your footage in just 2 clicks.

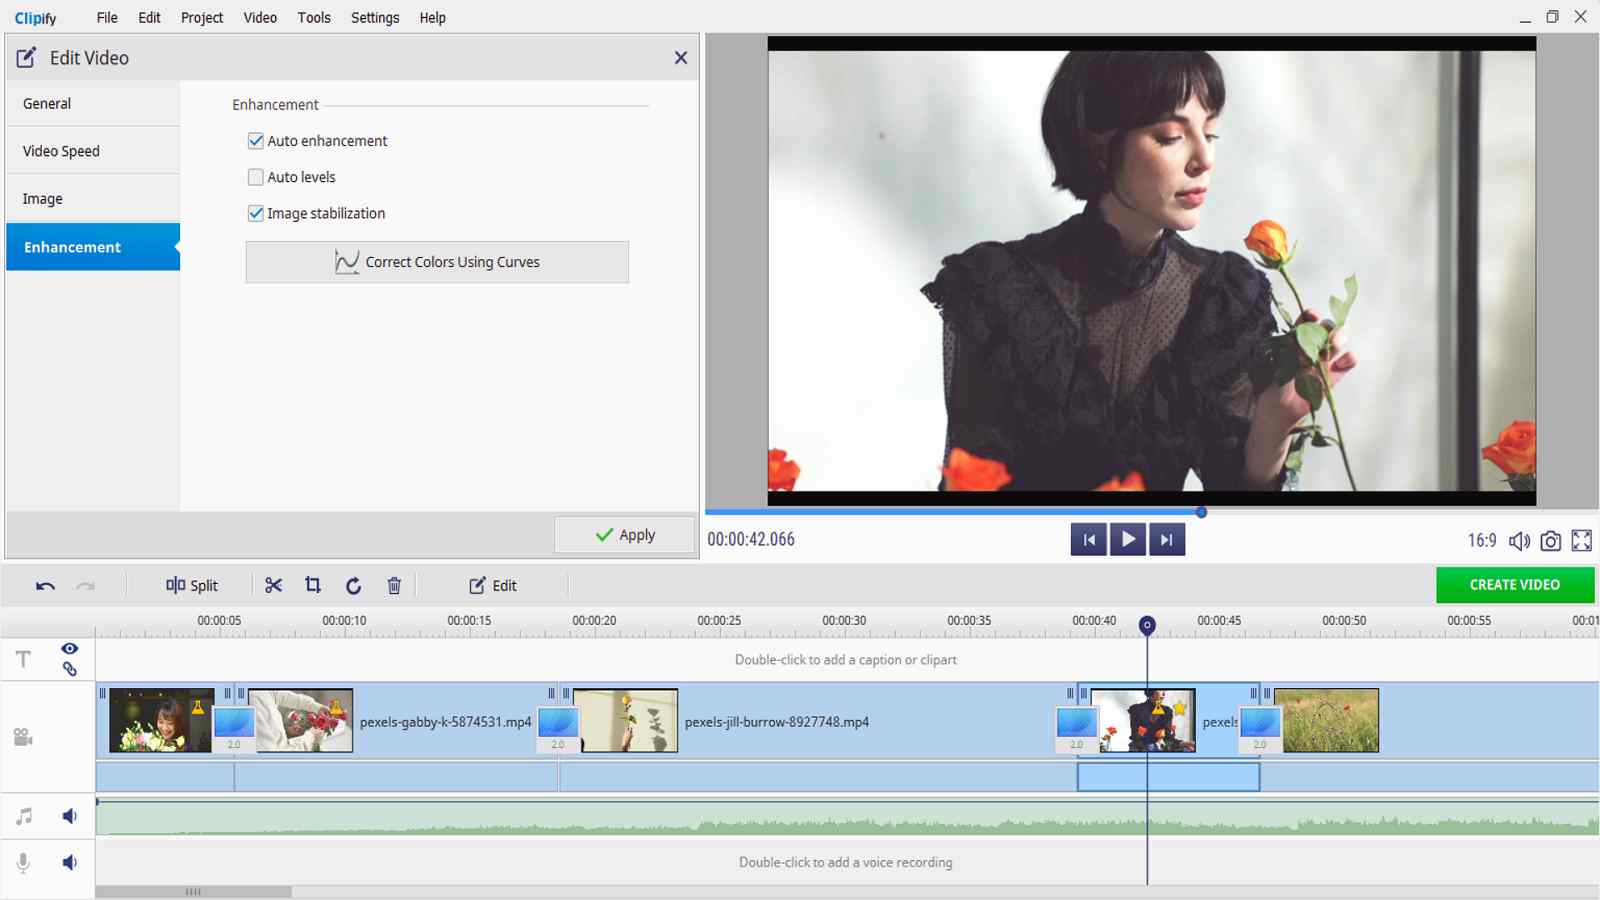
Here’s how to enhance video quality in Clipify with an automatic and a manual tool. Open the Enhancement tab and check the Auto enhancement, Auto levels, and Image stabilization boxes. In three clicks, the video quality has already become so much better. For in-depth correction, use the Curves tool and fix colors and brightness in the clips. You can also go to the Image tab and make other adjustments like Brightness, Contrast, Saturation, and Hue. All you’ll have to do is drag the sliders.
But all these changes won’t make any sense unless you select the aspect ratio and save the video in a suitable file format. Otherwise, black bars might show up and the quality will be lower when you play it on a new device or post it online. In Clipify, you can create an HD, AVI, and DVD video, or save the project as a video for the Internet or for a mobile device you choose.
2. iMovie for macOS
iMovie is a video editing program pre-installed on all Apple devices, including Mac. If you deleted the app earlier, don’t worry – you can download it from the App Store for free. The software recognizes most of the popular formats, like AVI, MOV, and MPEG 4. In iMovie, you can add titles to videos, apply transitions, cut the footage, and add music from your collection. You can also use the app to make the quality of your video better. Now let’s dive into a little how-to.

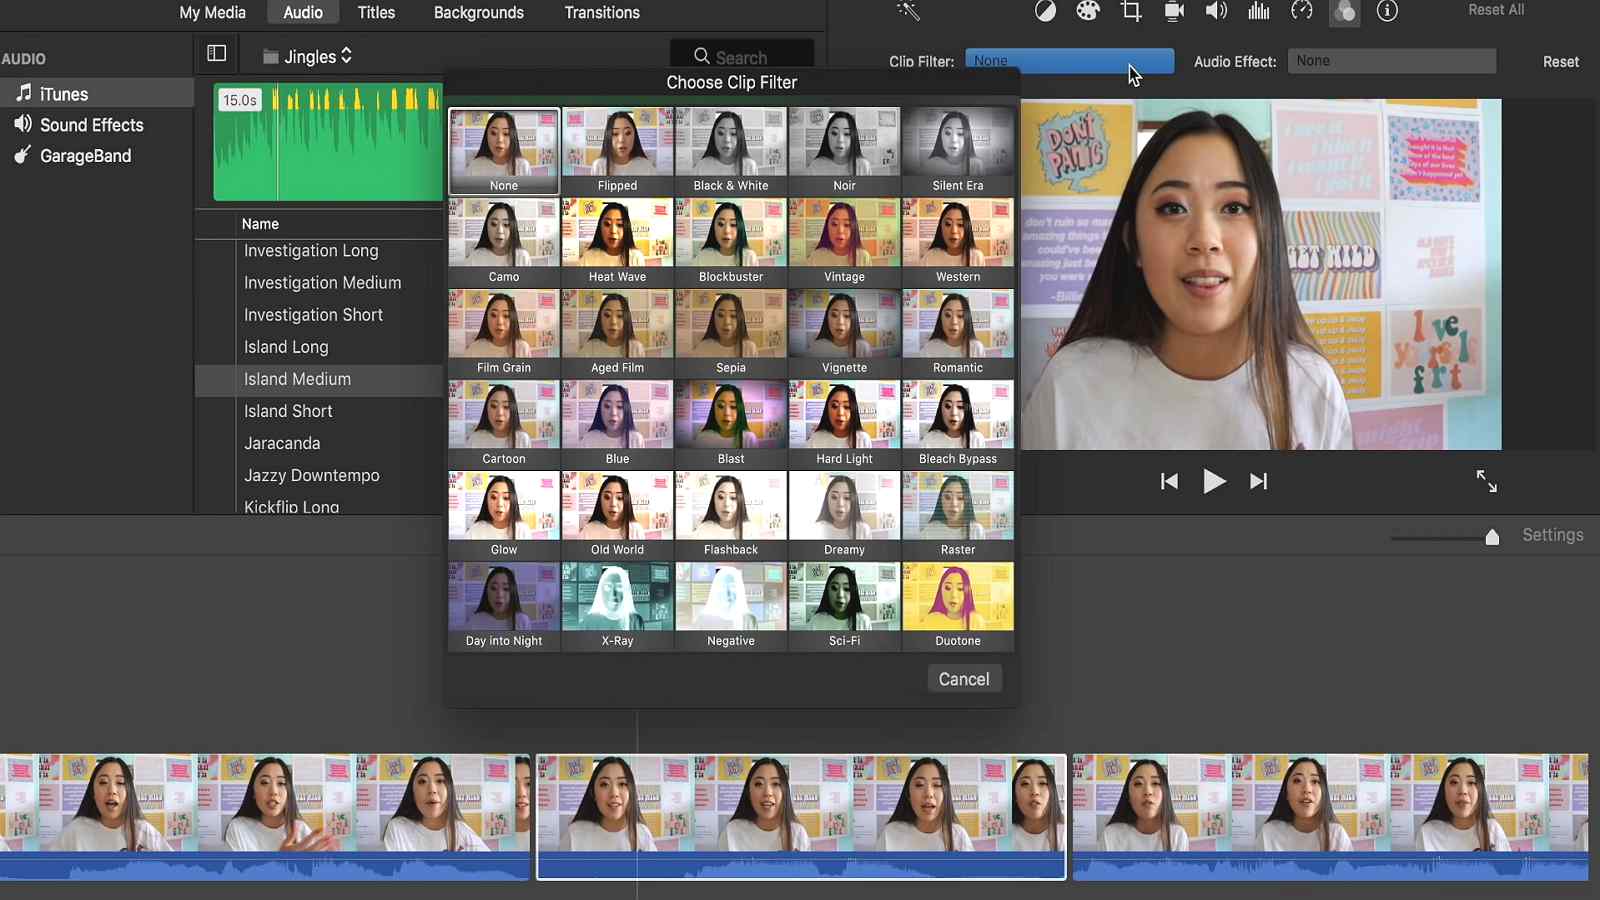
Once you start a new project and upload your footage, you’ll see a wand icon above the preview panel – click on it to automatically enhance the video. If you’re not satisfied with the result, hit the palette button to adjust the shadows, brightness, saturation, contrast, and other settings in each clip. All done? Then press the Share button in the upper right corner, select File, and save the edited video.
3. Vegas Pro For Windows
Vegas Pro is a computer program for advanced video editing. The program will be the best choice for those who need to prepare videos for professional use on a regular basis. The top-grade features offered in Vegas Pro include Multicam editing, Motion tracking, Advanced layer-based compositing, Multichannel audio editing, and so on. The program supports a multitude of file formats, such as MP4, AVI, ProRes, 4K XAVC S, XDCAM Optical, etc.

However, many users complain about the program freezing and losing work, so make sure your computer is suitable for this video editor. It might also take you a while to figure out how to use the features of this software. So if you don’t mind a steep learning curve and buying a subscription, then look at how to improve video quality with Vegas Pro.
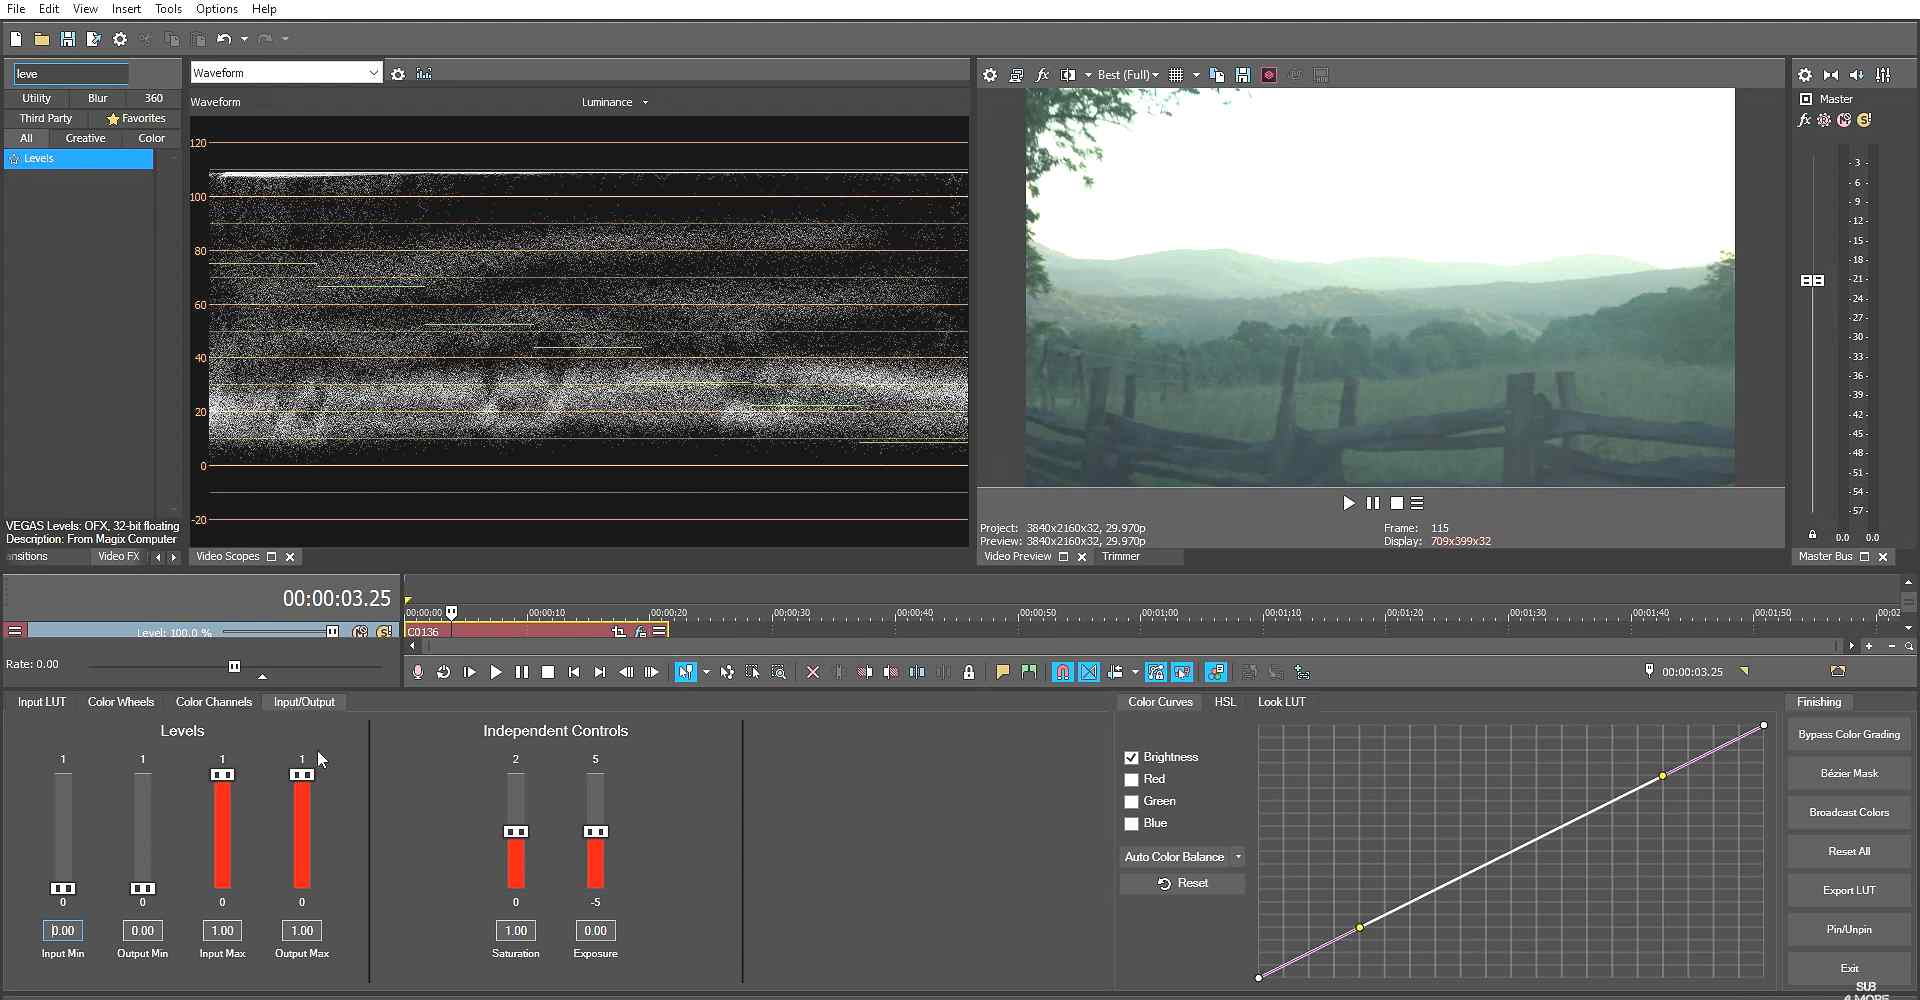
There are several tools you’ll need to use for this task. You can start with the Curves tool to adjust the hue, luminance, and saturation. Once it’s done, open the Sharpen settings to make the video look more detailed. Then you can get rid of shakes by applying the video stabilization effect – pick the mode, set the amount, and select the type of Motion Compensation. Now go to File, click Render As, and choose a file format to save the video in. The rendering process might take you some time due to the size of your project.
Summing Up
That’s it! We introduced the leaders of the video editing industry that will help you turn dull footage into an engaging video. They differ in their technical requirements and features but they are all good options to try. Still don’t know what to choose? For advanced tools, go for Vegas Pro – this software is rich in features for all kinds of edits. But it is only available for Windows and requires experience in video montage. Otherwise, you might spend days or weeks mastering the costly program. Want a simple video editor and high-quality results? Then go for the beginner-friendly Clipify – it has both ease of use, speed, and pro-level tools.
If you’re an Apple user, then you’ll be lucky to have the free iMovie on Mac – it will let you make basic adjustments in no time. However, the functionality won’t be enough for creating jaw-dropping videos to amaze your friends and colleagues.
Now you’re ready to decide on the program, and it’s time to install one and take your footage to a whole new level.

You can try an AI tool to upscale the video just like avclabs
Thanks a bunch for sharing this fantastic resource – it’s exactly what I needed!